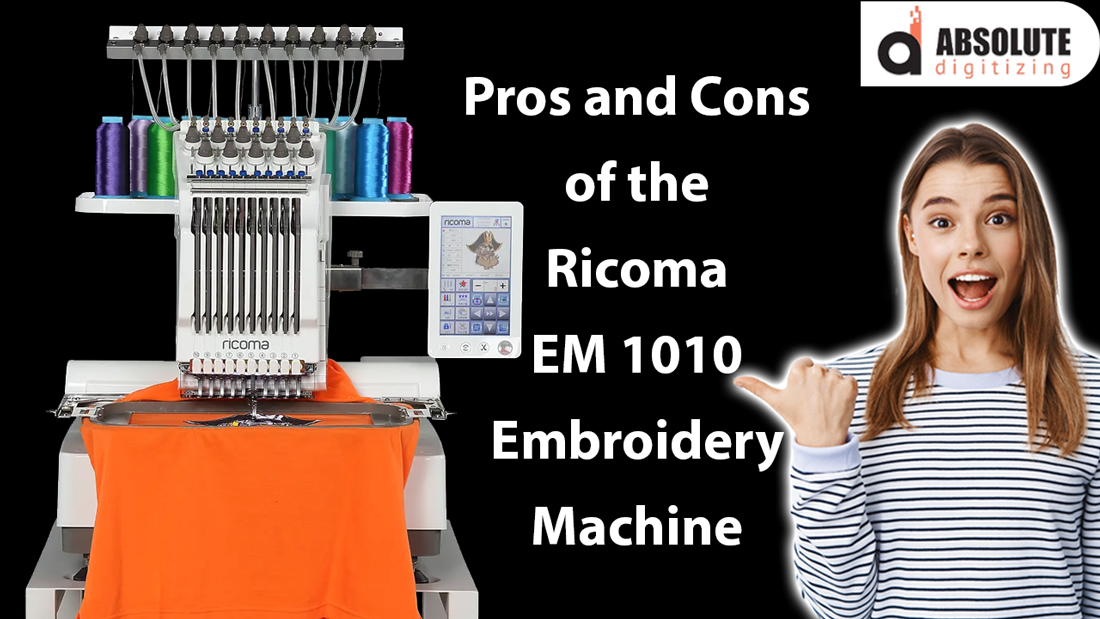
Introduction to Ricoma Embroidery Machines
Ricoma is a well-known brand in the embroidery industry, offering high-quality machines that cater to both beginners and professionals. Whether you are looking to start a small embroidery business or enhance your creative projects, Ricoma embroidery machines are designed to deliver exceptional results. This article serves as a comprehensive guide on how to use Ricoma embroidery machine , from initial setup to mastering advanced techniques.
Unboxing Your Ricoma Embroidery Machine
When you first receive your Ricoma embroidery machine, the excitement of starting a new project is palpable. However, it’s essential to take the time to unbox and set up the machine correctly to avoid any potential issues down the line.
What’s in the Box?
Inside the box, you will find your Ricoma embroidery machine along with several accessories. These typically include hoops, thread stands, needles, a USB drive with preloaded designs, and a manual. It’s crucial to inventory all items and ensure nothing is missing before proceeding.
Setting Up the Machine
Begin by placing the machine on a sturdy, flat surface. Ensure that it is positioned in a well-lit area with enough space to accommodate the machine’s movements. Follow the instructions in the manual to attach the necessary components, such as the thread stand and the embroidery arm. Plug in the machine and turn it on to ensure that it powers up correctly.
Initial Calibration and Testing
Before starting your first project, it’s recommended to perform an initial calibration. This involves checking the needle alignment, setting the correct tension, and running a test design to ensure everything is functioning properly. Calibration helps prevent issues like thread breakage or uneven stitching during your projects.
Understanding the Control Panel
The control panel of your Ricoma embroidery machine is the command center where you’ll input designs, adjust settings, and monitor the machine’s performance. Familiarizing yourself with the control panel is essential for efficient operation.
Basic Functions and Navigation
The control panel typically features a touch screen interface, making it easy to navigate through different options. You can select designs, adjust stitch length, change thread colors, and more. Understanding these basic functions will allow you to start your projects with ease.
Loading and Selecting Designs
Ricoma machines come with preloaded designs, but you can also import your own using the USB port. To load a design, simply insert the USB drive, navigate to the design folder on the control panel, and select the design you want to use. You can preview the design on the screen before starting the embroidery process.
Advanced Settings and Customization
For more experienced users, the control panel offers advanced settings that allow for greater customization. You can adjust stitch density, change the order of color stops, and even resize designs directly on the machine. Exploring these features can help you achieve more complex and personalized embroidery projects.
Choosing the Right Accessories
Accessories play a significant role in the quality and efficiency of your embroidery projects. Ricoma offers a wide range of accessories designed to enhance the capabilities of their machines.
Embroidery Hoops
Embroidery hoops are essential for stabilizing the fabric during stitching. Ricoma provides various hoop sizes, allowing you to work on different types of projects, from small logos to large jacket backs. Choosing the right hoop size for your project ensures optimal tension and prevents fabric distortion.
Needles and Threads
The choice of needles and threads can greatly impact the final outcome of your embroidery. Ricoma machines are compatible with a wide range of needles, including those designed for specific fabrics like denim or silk. Using high-quality threads that match the fabric type is crucial for achieving vibrant, long-lasting designs.
Optional Attachments
Ricoma also offers optional attachments, such as cap frames for embroidering hats and cylindrical frames for sleeves and pant legs. These attachments expand the versatility of your machine, allowing you to take on a broader range of projects.
Starting Your First Embroidery Project
Once you’ve set up your Ricoma embroidery machine and familiarized yourself with the control panel, it’s time to start your first project. Whether you’re creating a custom logo or a personalized gift, the process is straightforward with a Ricoma machine.
Selecting Your Fabric and Design
Begin by choosing the fabric and design for your project. Ensure that the fabric is appropriate for the design you have in mind. For example, dense designs work best on sturdy fabrics like cotton or denim, while lighter designs are more suitable for delicate fabrics like silk or chiffon.
Preparing the Fabric
Before hooping the fabric, it’s essential to prepare it by ironing out any wrinkles and applying a stabilizer to the back. The stabilizer helps to keep the fabric steady during stitching, preventing puckering or shifting. Once the fabric is prepared, place it in the hoop, ensuring it is taut and centered.
Embroidering the Design
Load the design onto the machine and position the hoop under the needle. Double-check the thread color and tension settings before starting the machine. As the machine begins stitching, monitor the process to ensure everything is running smoothly. If any issues arise, such as thread breaks or misalignment, pause the machine and make the necessary adjustments.
Troubleshooting Common Issues
Even with careful setup, you may encounter issues during your embroidery projects. Knowing how to troubleshoot these problems will save you time and frustration.
Thread Breakage
Thread breakage is a common issue that can be caused by several factors, including incorrect tension, poor-quality thread, or a worn needle. To fix this, check the tension settings, switch to a higher-quality thread, and replace the needle if necessary.
Fabric Puckering
Fabric puckering occurs when the fabric bunches up around the stitches, creating an uneven surface. This can be caused by improper hooping, insufficient stabilizer, or incorrect stitch density. Re-hoop the fabric, add additional stabilizer, and adjust the stitch density to resolve the issue.
Misaligned Designs
Misaligned designs can result from improper hooping, machine calibration issues, or an unstable work surface. To prevent this, ensure the fabric is properly hooped, the machine is calibrated, and the work surface is stable and level.
Maintenance and Care of Your Ricoma Embroidery Machine
Regular maintenance is crucial for keeping your Ricoma embroidery machine in top working condition. Proper care not only extends the life of the machine but also ensures consistent quality in your projects.
Cleaning and Lubrication
Regular cleaning and lubrication are essential to prevent dust buildup and reduce friction between moving parts. Follow the manufacturer’s guidelines for cleaning the machine and applying lubricant to key areas like the needle bar and hook assembly.
Needle and Thread Inspection
Inspect the needle and thread path regularly for signs of wear or damage. Replace the needle after every few projects or if you notice any bending or dullness. Ensure that the thread path is clear of lint and debris to prevent thread breakage or tension issues.
Software Updates
Ricoma frequently releases software updates that enhance the machine’s performance and add new features. Check the manufacturer’s website regularly for updates and install them as needed to keep your machine running smoothly.
Expanding Your Skills with Ricoma Machines
Once you’ve mastered the basics of operating your Ricoma embroidery machine, you can explore more advanced techniques and projects.
Customizing Designs
Ricoma embroidery machine offer a variety of customization options, allowing you to modify existing designs or create new ones from scratch. Experiment with different stitch types, colors, and effects to create unique, personalized projects.
Learning Advanced Techniques
Advanced techniques like applique, 3D puff embroidery, and in-the-hoop projects can add depth and dimension to your designs. Take the time to learn these techniques and practice them on sample fabrics before incorporating them into your projects.
Joining the Ricoma Community
Ricoma has a strong community of users who share tips, tutorials, and inspiration. Joining online forums, attending webinars, and participating in social media groups can help you connect with other embroiderers, learn new skills, and stay updated on the latest trends in embroidery.
Conclusion
Getting started with Ricoma embroidery machine is an exciting journey into the world of creative stitching. By following this guide by Absolute Digitizing, you’ll be well on your way to mastering your machine and producing high-quality embroidery projects. From understanding the basics to exploring advanced techniques, the possibilities with Ricoma embroidery machine are endless. Happy embroidering!


